Friday, August 19, 2016
Add your Signature to Gmail Messages
Add your Signature to Gmail Messages

Many of you might be familiar with the Auto Signature feature of Gmail. But you need to add this manually and it requires to be turned on by the user himself. Lets see how to add this . . .
About Gmail Signature
About Gmail Signature
When we write a letter to someone, we normally sign at the end of that letter. In case of email messages, signing is not that important.
But in case of official email messages, we usually mention our name, designation and organization.
But you dont need to do this manually every time. If you type few words (what may be included as signature) in the signature option and enable it, Gmail will do the rest automatically.

Add your Signature
- Sign in to your Gmail ID.
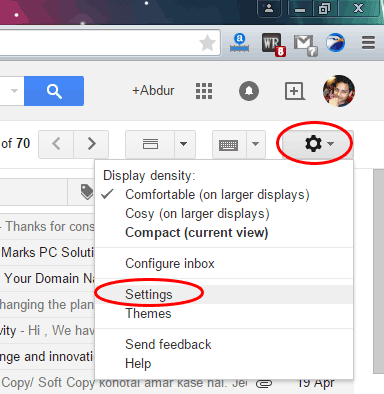
- Hit on the Settings Gear
from the top right corner and choose Settings.
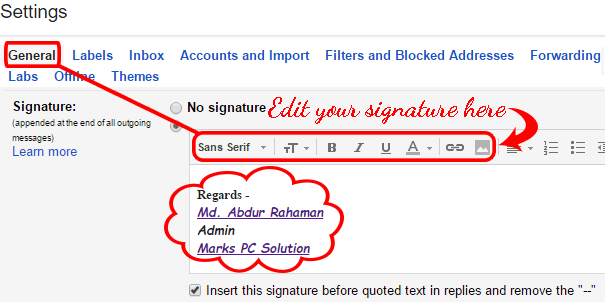
- Now make sure youre in the General tab.
- There are lots of options under General. Scroll down and find the option - Signature.
- By default, No Signature option might be selected. Youve to select the next radio button to enable it.
- Now type few words in the box as your signature. You can articulate your text with the help of formatting options. You can also upload image or create hyperlink here.
- When youre done, scroll down to the bottom. Hit on the Save Changes button.
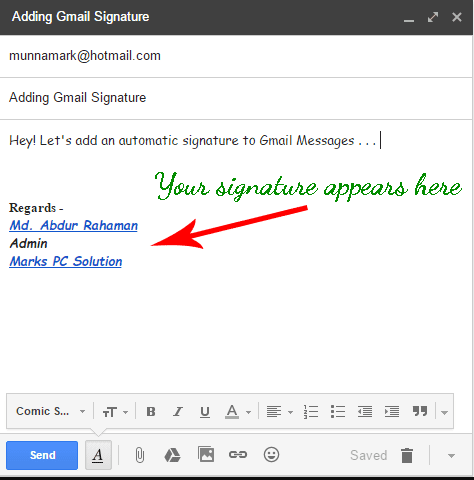
- Finally, hit on the COMPOSE button and see the result!
Hit on the following button to directly go to the Gmail Settings . . .

Settings > General > Signature > Type your Signature . . .

Tips: you can also use your real signature here! Sign on a paper > Scan & upload it as image!
Hit on the Compose button to send a new message > Your signature texts will appear as shown below.

Hopefully, this tutorial will help you all. If you need even more stuffs regarding signature option, then follow Gmail Help page . . .
Thanks for visiting!
Stay with Marks PC Solution to get more interesting IT topics!
Available link for download