Showing posts with label blogger. Show all posts
Showing posts with label blogger. Show all posts
Tuesday, October 25, 2016
Best Blogger Templates For Adsense In 2016
Best Blogger Templates For Adsense In 2016
Best and beautiful blogger templates for Adsense in 2016. This is the best templates for adsense, Install these templates on your blogs and earn extra income form your blog.
#1: Smart News Responsive Blogger Template

Download Demo
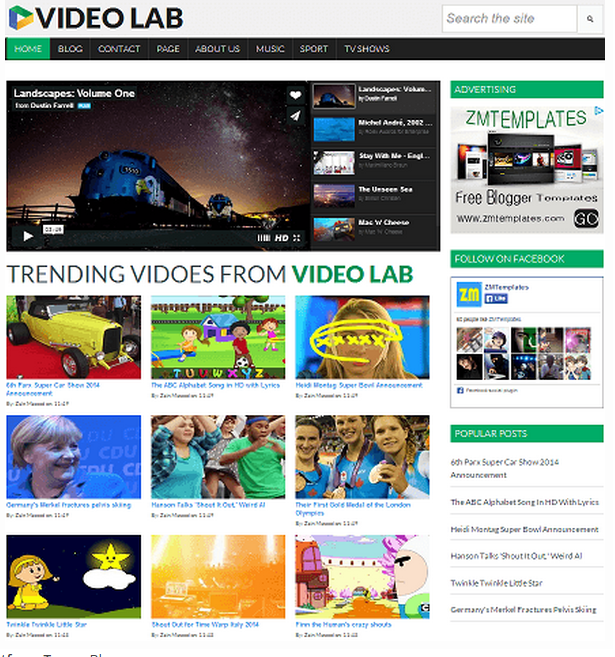
#2: Video Lab Blogger Template
Download Demo
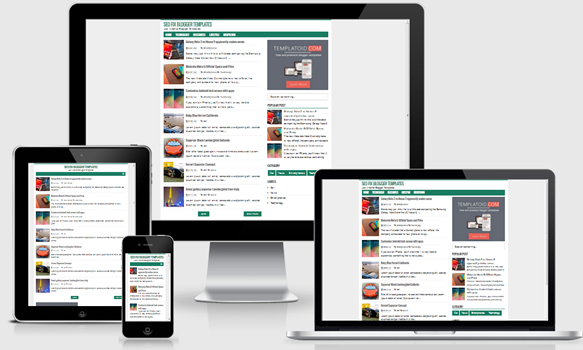
#3: Seo Fix Blogger Template
Download Demo
#4: Intime Mag blogger template

Download Demo
#5: Kaizen Awensome Blogger Template

Download Demo
#6: My Extra news blogger template
Myextra news is another best blogger template for adsense. Download this templates to click the download link now.



#7: Adventure blogger template
Adventure is also best blogger template. Adventure template is designed by google groups and they are special for adsense.

Education pres is a beautiful blogger template for adsense, You can download it form the download link.

#9: iTech blogger template
Itech is another beautiful blogger template for adsense in 2014. You can download it and start making extra.

#1: Labnol blogger template.
Labnol is a Free Blogger template. If you want to download labnol blogger template click the provided download link now.
This beautiful blogger templates help you to generate extra income from you blog. Download and install these templates on your blog and get extra click on your ads.
Available link for download

Tuesday, October 18, 2016
Add Floating Share Buttons Widget For Blogger Blogspot
Add Floating Share Buttons Widget For Blogger Blogspot

The design is very attractive widget with animation from top to bottom and encourages readers to share your article easily by clicking on one of these buttons.
we spend now to install this widget
Go To Blogger > Design
Choose a HTML/JavaScript widget
Paste the following code inside it,
<style> /*-------All Blogger Tools------------*/ #floatdiv { position:absolute; width:94px; height:229px; top:0; left:0; z-index:100 } #mbtsidebar { border:1px solid #ddd; padding-left:5px; position:relative; height:220px; width:55px; margin:0 0 0 5px; } </style> <div id="floatdiv"> <div id="mbtsidebar"> <table cellpadding="1px" cellspacing="0"> <tr> <td style="border-bottom: 1px solid #E8E8E8; padding:5px 0 2px 0;"> <div id="fb-root"></div><script src="http://connect.facebook.net/en_US/all.js#xfbml=1"></script><fb:like href="" send="false" layout="box_count" show_faces="false" font=""></fb:like> </td> </tr> <tr> <td style="border-bottom: 1px solid #E8E8E8; padding:5px 0px;"> <g:plusone size="Tall" expr_href="data:post.url"> </g:plusone></td> </tr> <tr> <td style="border-bottom: 0px solid #E8E8E8; padding:5px 0 0px 0;"> <a href="http://twitter.com/share" class="twitter-share-button" data-count="vertical" data-via="allbloggertool1">Tweet</a><script type="text/javascript" src="http://platform.twitter.com/widgets.js"></script> </td> </tr> <tr> <td style="border-bottom: 0px solid #E8E8E8; padding:0px 0 0px 0;"> <p style=" font-size:10px; text-align:center; color:#ddd;"><a style="color:#ddd;" href="http://all-blogger-tools.blogspot.com/" target="_blank">Widgets</a></p> </td> </tr> </table> </div> </div> <script type="text/javascript"> // JavaScript Document <!-- /* Script by: www.jtricks.com * Version: 20071017 * Latest version: * www.jtricks.com/javascript/navigation/floating.html */ var floatingMenuId = floatdiv; var floatingMenu = { targetX: 0, targetY: 300, hasInner: typeof(window.innerWidth) == number, hasElement: typeof(document.documentElement) == object && typeof(document.documentElement.clientWidth) == number, menu: document.getElementById ? document.getElementById(floatingMenuId) : document.all ? document.all[floatingMenuId] : document.layers[floatingMenuId] }; floatingMenu.move = function () { floatingMenu.menu.style.left = floatingMenu.nextX + px; floatingMenu.menu.style.top = floatingMenu.nextY + px; } floatingMenu.computeShifts = function () { var de = document.documentElement; floatingMenu.shiftX = floatingMenu.hasInner ? pageXOffset : floatingMenu.hasElement ? de.scrollLeft : document.body.scrollLeft; if (floatingMenu.targetX < 0) { floatingMenu.shiftX += floatingMenu.hasElement ? de.clientWidth : document.body.clientWidth; } floatingMenu.shiftY = floatingMenu.hasInner ? pageYOffset : floatingMenu.hasElement ? de.scrollTop : document.body.scrollTop; if (floatingMenu.targetY < 0) { if (floatingMenu.hasElement && floatingMenu.hasInner) { // Handle Opera 8 problems floatingMenu.shiftY += de.clientHeight > window.innerHeight ? window.innerHeight : de.clientHeight } else { floatingMenu.shiftY += floatingMenu.hasElement ? de.clientHeight : document.body.clientHeight; } } } floatingMenu.calculateCornerX = function() { if (floatingMenu.targetX != center) return floatingMenu.shiftX + floatingMenu.targetX; var width = parseInt(floatingMenu.menu.offsetWidth); var cornerX = floatingMenu.hasElement ? (floatingMenu.hasInner ? pageXOffset : document.documentElement.scrollLeft) + (document.documentElement.clientWidth - width)/2 : document.body.scrollLeft + (document.body.clientWidth - width)/2; return cornerX; }; floatingMenu.calculateCornerY = function() { if (floatingMenu.targetY != center) return floatingMenu.shiftY + floatingMenu.targetY; var height = parseInt(floatingMenu.menu.offsetHeight); // Handle Opera 8 problems var clientHeight = floatingMenu.hasElement && floatingMenu.hasInner && document.documentElement.clientHeight > window.innerHeight ? window.innerHeight : document.documentElement.clientHeight var cornerY = floatingMenu.hasElement ? (floatingMenu.hasInner ? pageYOffset : document.documentElement.scrollTop) + (clientHeight - height)/2 : document.body.scrollTop + (document.body.clientHeight - height)/2; return cornerY; }; floatingMenu.doFloat = function() { // Check if reference to menu was lost due // to ajax manipuations if (!floatingMenu.menu) { menu = document.getElementById ? document.getElementById(floatingMenuId) : document.all ? document.all[floatingMenuId] : document.layers[floatingMenuId]; initSecondary(); } var stepX, stepY; floatingMenu.computeShifts(); var cornerX = floatingMenu.calculateCornerX(); var stepX = (cornerX - floatingMenu.nextX) * .07; if (Math.abs(stepX) < .5) { stepX = cornerX - floatingMenu.nextX; } var cornerY = floatingMenu.calculateCornerY(); var stepY = (cornerY - floatingMenu.nextY) * .07; if (Math.abs(stepY) < .5) { stepY = cornerY - floatingMenu.nextY; } if (Math.abs(stepX) > 0 || Math.abs(stepY) > 0) { floatingMenu.nextX += stepX; floatingMenu.nextY += stepY; floatingMenu.move(); } setTimeout(floatingMenu.doFloat(), 20); }; // addEvent designed by Aaron Moore floatingMenu.addEvent = function(element, listener, handler) { if(typeof element[listener] != function || typeof element[listener + _num] == undefined) { element[listener + _num] = 0; if (typeof element[listener] == function) { element[listener + 0] = element[listener]; element[listener + _num]++; } element[listener] = function(e) { var r = true; e = (e) ? e : window.event; for(var i = element[listener + _num] -1; i >= 0; i--) { if(element[listener + i](e) == false) r = false; } return r; } } //if handler is not already stored, assign it for(var i = 0; i < element[listener + _num]; i++) if(element[listener + i] == handler) return; element[listener + element[listener + _num]] = handler; element[listener + _num]++; }; floatingMenu.init = function() { floatingMenu.initSecondary(); floatingMenu.doFloat(); }; // Some browsers init scrollbars only after // full document load. floatingMenu.initSecondary = function() { floatingMenu.computeShifts(); floatingMenu.nextX = floatingMenu.calculateCornerX(); floatingMenu.nextY = floatingMenu.calculateCornerY(); floatingMenu.move(); } if (document.layers) floatingMenu.addEvent(window, onload, floatingMenu.init); else { floatingMenu.init(); floatingMenu.addEvent(window, onload, floatingMenu.initSecondary); } //--> </script>
Replace allbloggertool1 with your Twitter username.
PS: If you have already added the Google +1 Button somewhere in your blog then you need to add this code Just above
</head>
<script src=http://apis.google.com/js/plusone.js type=text/javascript> {lang: 'en-US'} </script>
Now you are done.
Available link for download
Monday, October 17, 2016
Floating Facebook Like Box Widget For Blogger
Floating Facebook Like Box Widget For Blogger

In This Post i will show you how to add a Floating Facebook Like Box Widget For Blogger. This will Floating Facebook Button when to move your cursor on it it pop out with stylish floating facebook like box. This widget can help you to increase facebook likes. You just need to our small code to your blogger blog. Currently this widget is only for Bloggeer/Blogspotblogs.
- Go to Design > Page Elements.
- Click Add A Gadget.
- Select HTML/Javascript .
- Paste the following code inside it,
<script type="text/javascript"> /*<![CDATA[*/ jQuery(document).ready(function() {jQuery(".abtlikebox").hover(function() {jQuery(this).stop().animate({right: "0"}, "medium");}, function() {jQuery(this).stop().animate({right: "-250"}, "medium");}, 500);}); /*]]>*/ </script> <style type="text/css"> .abtlikebox{background: url("https://blogger.googleusercontent.com/img/b/R29vZ2xl/AVvXsEiMYY1bbbI0WgHdqwxalLyoarV9kCBxLvV3B9J8vYrRWH20peoaN9tnbC17k7Zn2OBdbgokeUhguRIQyslCwjuBCgWr9gH_kbzZ4bgBoykRyMpalOgdZ9XT1zBNeAvV-R9F-Me2cGgqTMI/s320/fb1-right.png") no-repeat scroll left center transparent !important; float: right;height: 270px;padding: 0 5px 0 46px;width: 245px;z-index: 99999;position:fixed;right:-250px;top:20%;} .abtlikebox div{ padding: 0; margin-right:-8px; border:4px solid #3b5998; background:#fafafa;} .abtlikebox span{bottom: 4px;font: 8px "lucida grande",tahoma,verdana,arial,sans-serif;position: absolute;right: 6px;text-align: right;z-index: 99999;} .abtlikebox span a{color: gray;text-decoration:none;} .abtlikebox span a:hover{text-decoration:underline;} } </style> <div class="abtlikebox" style=""> <div> <iframe src="http://www.facebook.com/plugins/likebox.php?href=http%3A%2F%2Ffacebook.com%2Fallbloggertools1&width=245&colorscheme=light&show_faces=true&border_color=white&connections=9&stream=false&header=false&height=270" scrolling="no" frameborder="0" scrolling="no" style="border: white; overflow: hidden; height: 270px; width: 245px;background:#fafafa;"></iframe><span>Widget by :<a href="http://all-blogger-tools.blogspot.com">blogger widget</a></span> </div> </div>
Available link for download
Tuesday, September 20, 2016
Top 4 Seo Friendly Responsive Blogger Templates For High Adsense Earning
Top 4 Seo Friendly Responsive Blogger Templates For High Adsense Earning
Top 4 responsive blogger templates 2015 free download. This is small list of top 4 best ever responsive professional blogger templates 2015. This blogger templates is completely free to download. These 4 responsive blogger templates is worlds best responsive blogger templates.
You can download these templates from the available download link. Select a template and click the download button to download selected theme.
Personal Mag Responsive Blogger Template

Download Live Preview
Awesome Mag Responsive Blogger Template

Download Live Preview
Movieism Freeware Responsive Blogger Template
 Available link for download
Saturday, September 17, 2016
Top 5 Beautiful Responsive Blogger Templates 2016
Top 5 Beautiful Responsive Blogger Templates 2016
Top 5 beautiful free blogger template 2016 free download. If you are find a professional blogger template for your blog. Then you are coming at the right place. Today i am going to share best free professional blogger template. You can choose your favorite template from the below, and you can download it by clicking on the download link.
1# Fiz Software Responsive Blogger Template

Download Demo
2# JpStationBlue Responsive Blogger Template

Download Demo
3# Kaizen Awensome Magz Responsive Blogger Template

Download Demo
4# Minima Colored 3 Responsive Blogger Template

Download Demo
5# Nivo Magz Responsive Blogger Template

Download Demo
If you feel any problem in downloading links, Please share your problem in comments. We will fix it in couple of minutes,.So download the top 5 most beautiful templates for free now.
Available link for download
Saturday, September 3, 2016
How to Backup of your Blogger blogs easily
How to Backup of your Blogger blogs easily

To day i will tell you about taking backup of your important and all posts from blogger blog. you can read it step by step.
First of all Happy Diwali to all the readers of All Blogger Tricks. May this Diwali bring lot of brightness and happiness in your life.
Today I am going to tell you how you can easily backup your blogger blogs in 3 different ways. Backing a blog is a thing which must be practiced by every blogger. Though Blogger is owned by Google and is one of the most secured platform and cant be hacked easily still we never know if our password gets stolen or we by mistake delete a post.
A blogger must backup his blog periodically and to make this task easier I am going to tell you how you can do this by 3 different methods. So here they are -
Method 1 : The Traditional Way
This is certainly the most common method and many of you out here may know it. In this method we Import the blog posts and download the blogs template from Blogger.com itself. A detailed post on the same can be find on the below link which I have wrote earlier.
Read : How to make a Full backup of your Blogger blog
Method 2 : Downloading Data from Google Dashboard
This is probably the easiest method to backup all your blogs template and posts with just few clicks. So to make backup from this method follow the steps below -
1. First of all go to Google Dashboard. You would be asked to login there.
2. After logging in, click "Download Your Data" link which will be on the left sidebar.
3. Click on Create an Archive Button.
4. A list of many Google Products will come, from the list select Blogger. After Selecting click on the button "Create Archive" which will be at the top of the list.
6. One you sign in again, you can download the backup of all the blog you have in your blogger account with their template and posts. The backup is now saved in your local disk.

2. After logging in, click "Download Your Data" link which will be on the left sidebar.
3. Click on Create an Archive Button.
4. A list of many Google Products will come, from the list select Blogger. After Selecting click on the button "Create Archive" which will be at the top of the list.
5. After clicking a Progress Bar will show the status of your archive being created. After few seconds a download button will appear. Clicking that you will again be prompted to Sign in for security reasons.
6. One you sign in again, you can download the backup of all the blog you have in your blogger account with their template and posts. The backup is now saved in your local disk.
Method 3 : Backup via Software
The third method is also quite easy. In this method we will use a third party software which is Blogger Backup Utility. This software helps you download the posts of your blogger blog (no template backup) easily with the help of the blogs feed. You get various options to workout with the software. To make a backup from Blogger Backup Utility follow the below steps -
1. Download Blogger Backup Utility from HERE. Extract and Install the Software.
2. From the available blogs dropdown select Add/Update/Remove Blogs option.
3. Enter your Blogger ID and password and wait for the blogs list to be fetched.
4. Once the process is completed select the desired blog from the dropdown and get a look at the below options such as as save post in individual or single file etc.
5. Lastly click on Backup Posts button and the backup will be saved in the folder selected. Thats it. Your posts are now backed up and saved in your local disk.
We are working hard to provide you your desired instructions and techniques.I hope these methods will help you in making your blog more secure. We are thankful to you for visiting our blog www.bloggingtrainings.blogspot.com.
Available link for download
Thursday, September 1, 2016
JQUERY IMAGE SLIDER FOR BLOGGER
JQUERY IMAGE SLIDER FOR BLOGGER
Moving jquery image slider for featured content in Blogger

How to Install This Widget on Blogger?
Steps...
A. Adding CSS Theme Code
B. Adding Script Code
C. Adding HTML Code
Adding CSS Theme Code
In old layout: Go to Dashboard - Design - Edit HTML - Expand Widget Templates.
In new layout: Go to Dashboard - Template - Edit Template HTML - Expand Widget Templates.
Now find (CTRL+F) this code in the template:
]]></b:skin>
And immediately before it, paste this code:
#myslides{
background:#000 url(https://blogger.googleusercontent.com/img/b/R29vZ2xl/AVvXsEj7WMCCGbbedhBMr96845p4aR6biG0-AkCFW9DSULDgpCq8ednRjAoDjQPMqW5xcX6_6c8EOpJIw0MhD2CuwtGjZs5QykuHHNCCRW7beUvLjX3HZBhyphenhyphenrYCMp2x7VxljABdSC7uVuPHVVA/s1600/mslid.jpg) repeat-x;
width: 650px;
height:165px;
margin-bottom:5px;
}
.stepcarousel{
position: relative; /*leave this value alone*/
overflow: scroll; /*leave this value alone*/
width: 554px; /*Width of Carousel Viewer itself*/
height: 160px; /*Height should enough to fit largest contents height*/
margin: 0px 48px 5px 48px;
}
.stepcarousel .belt{
position: absolute; /*leave this value alone*/
left: 0;
top: 0;
}
.stepcarousel .panel{
float: left; /*leave this value alone*/
overflow: hidden; /*clip content that go outside dimensions of holding panel DIV*/
margin: 20px 10px ; /*margin around each panel*/
width:170px; /*Width of each panel holding each content. If removed, widths should be individually defined on each content DIV then. */
background:#0e1829;
height:120px;
border:1px solid #1d2c44;
}
.stepcarousel .panel p{
text-align: left; /*leave this value alone*/
overflow: hidden; /*clip content that go outside dimensions of holding panel DIV*/
margin: 5px 5px ; /*margin around each panel*/
}
.stepcarousel .panel h2{
text-align: left; /*leave this value alone*/
height:20px;
overflow: hidden; /*clip content that go outside dimensions of holding panel DIV*/
margin: 2px 5px ; /*margin around each panel*/
font-size:16px;
font-weight:bold;
text-align:center;
font-family:Georgia,century gothic,Arial,verdana, sans-serif;
}
.stepcarousel .panel img{
float: left; /*leave this value alone*/
background:#0E1829; /*clip content that go outside dimensions of holding panel DIV*/
margin: 5px 5px 5px 5px; /*margin around each panel*/
padding:0px 0px;
}
background:#000 url(https://blogger.googleusercontent.com/img/b/R29vZ2xl/AVvXsEj7WMCCGbbedhBMr96845p4aR6biG0-AkCFW9DSULDgpCq8ednRjAoDjQPMqW5xcX6_6c8EOpJIw0MhD2CuwtGjZs5QykuHHNCCRW7beUvLjX3HZBhyphenhyphenrYCMp2x7VxljABdSC7uVuPHVVA/s1600/mslid.jpg) repeat-x;
width: 650px;
height:165px;
margin-bottom:5px;
}
.stepcarousel{
position: relative; /*leave this value alone*/
overflow: scroll; /*leave this value alone*/
width: 554px; /*Width of Carousel Viewer itself*/
height: 160px; /*Height should enough to fit largest contents height*/
margin: 0px 48px 5px 48px;
}
.stepcarousel .belt{
position: absolute; /*leave this value alone*/
left: 0;
top: 0;
}
.stepcarousel .panel{
float: left; /*leave this value alone*/
overflow: hidden; /*clip content that go outside dimensions of holding panel DIV*/
margin: 20px 10px ; /*margin around each panel*/
width:170px; /*Width of each panel holding each content. If removed, widths should be individually defined on each content DIV then. */
background:#0e1829;
height:120px;
border:1px solid #1d2c44;
}
.stepcarousel .panel p{
text-align: left; /*leave this value alone*/
overflow: hidden; /*clip content that go outside dimensions of holding panel DIV*/
margin: 5px 5px ; /*margin around each panel*/
}
.stepcarousel .panel h2{
text-align: left; /*leave this value alone*/
height:20px;
overflow: hidden; /*clip content that go outside dimensions of holding panel DIV*/
margin: 2px 5px ; /*margin around each panel*/
font-size:16px;
font-weight:bold;
text-align:center;
font-family:Georgia,century gothic,Arial,verdana, sans-serif;
}
.stepcarousel .panel img{
float: left; /*leave this value alone*/
background:#0E1829; /*clip content that go outside dimensions of holding panel DIV*/
margin: 5px 5px 5px 5px; /*margin around each panel*/
padding:0px 0px;
}
Adding Script Code
Now find (CTRL+F) this code in the template:
Step 2:And find the code </head>
Step 3: Now add the following code just before the </head> tag.
<a href="http://24work.blogspot.com" target="_blank" title="Blogger Widgets"><img src="http://safir85.ucoz.com/24work-blogspot/cursor-24work-10.png" border="0" alt="Blogger Widgets" style="position:absolute; top: 0px; right: 0px;" /></a><!-- JavaScript Slider -->
<script src=http://safir85.ucoz.com/24work-blogspot/featured-post-s/jquery-1.3.2.min.js type=text/javascript/>
<script src=http://safir85.ucoz.com/24work-blogspot/featured-post-s/30111191622-slider.js type=text/javascript/>
<!-- End JavaScript Slider -->
<script type=text/javascript>
stepcarousel.setup({
galleryid: 'mygallery', //id of carousel DIV
beltclass: 'belt', //class of inner "belt" DIV containing all the panel DIVs
panelclass: 'panel', //class of panel DIVs each holding content
panelbehavior: {speed:1500, wraparound:true, persist:true},
autostep: {enable:true, moveby:1, pause:1000},
defaultbuttons: {enable: true, moveby: 4, leftnav: ['https://blogger.googleusercontent.com/img/b/R29vZ2xl/AVvXsEiVDKHQQqCaygtud7ugYK0ux1mvv20wYD5VpwZcK7o_NVfQWamuCEspVLTHAFj7RVehDdaJ-eLG76ZI_Jebu-S_D0SnUQwMhw4mul3jyF755oIYQRtw_dwLLJtZujOOeHH6wgQNXFEysaA/s400/left.jpg', -48, 0], rightnav: ['https://blogger.googleusercontent.com/img/b/R29vZ2xl/AVvXsEjf6tkic2B6yaRKXeg0OyogIIDsP-FHZPcB7KK4BZT7vqt43D1C3SBw2VWdXc9CZf1QnlRbUHBVIho1SAgvBotN9ceBVaPmUpuNAFOikzIWnL8i4lIT5SMtrTy6UwFkAbHdnEvWihQNNHo/s400/right.jpg', 0, 0]},
statusvars: ['statusA', 'statusB', 'statusC'], //register 3 variables that contain current panel (start), current panel (last), and total panels
contenttype: ['external'] //content setting ['inline'] or ['external', 'path_to_external_file']
})
</script>
<script src=http://safir85.ucoz.com/24work-blogspot/featured-post-s/jquery-1.3.2.min.js type=text/javascript/>
<script src=http://safir85.ucoz.com/24work-blogspot/featured-post-s/30111191622-slider.js type=text/javascript/>
<!-- End JavaScript Slider -->
<script type=text/javascript>
stepcarousel.setup({
galleryid: 'mygallery', //id of carousel DIV
beltclass: 'belt', //class of inner "belt" DIV containing all the panel DIVs
panelclass: 'panel', //class of panel DIVs each holding content
panelbehavior: {speed:1500, wraparound:true, persist:true},
autostep: {enable:true, moveby:1, pause:1000},
defaultbuttons: {enable: true, moveby: 4, leftnav: ['https://blogger.googleusercontent.com/img/b/R29vZ2xl/AVvXsEiVDKHQQqCaygtud7ugYK0ux1mvv20wYD5VpwZcK7o_NVfQWamuCEspVLTHAFj7RVehDdaJ-eLG76ZI_Jebu-S_D0SnUQwMhw4mul3jyF755oIYQRtw_dwLLJtZujOOeHH6wgQNXFEysaA/s400/left.jpg', -48, 0], rightnav: ['https://blogger.googleusercontent.com/img/b/R29vZ2xl/AVvXsEjf6tkic2B6yaRKXeg0OyogIIDsP-FHZPcB7KK4BZT7vqt43D1C3SBw2VWdXc9CZf1QnlRbUHBVIho1SAgvBotN9ceBVaPmUpuNAFOikzIWnL8i4lIT5SMtrTy6UwFkAbHdnEvWihQNNHo/s400/right.jpg', 0, 0]},
statusvars: ['statusA', 'statusB', 'statusC'], //register 3 variables that contain current panel (start), current panel (last), and total panels
contenttype: ['external'] //content setting ['inline'] or ['external', 'path_to_external_file']
})
</script>
And now click Save Template
Adding HTML Code
So, lets see how to install this cool widget in your blog..
1. Sign into Blogger dashboard
old Blogger interface: Go to Dashboard - Design - Page Elements - Add a Gadget.If youre using the new Blogger interface: Go to Dashboard - Layout - Add a Gadget.Select HTML/Javascript and add the one of code given below.Just copy and paste this code..
<div id="myslides">
<div id="mygallery" class="stepcarousel">
<div class="belt">
<!-- 1st Template -->
<div class=panel>
<a href=http://bdlab.blogspot.com/ target=blank title=made in spain> <img alt=made in spain height=135 src=http://safir85.ucoz.com/bdlab-blogspot/24work/falling-text/8.gif width=185/> </a>
</div>
<!--end code of 1st Template -->
<!-- 2nd Template -->
<div class=panel>
<a href=http://bdlab.blogspot.com/ target=blank title=fashion press> <img alt=fashion press height=135 src=http://safir85.ucoz.com/bdlab-blogspot/24work/falling-text/8.gif width=185/> </a>
</div>
<!--end code of 2nd Template -->
<!-- 3rd Template -->
<div class=panel>
<a href=http://bdlab.blogspot.com/ target=blank title=techlure> <img alt=techlure height=135 src=http://safir85.ucoz.com/bdlab-blogspot/24work/falling-text/8.gif title=techlure width=185/> </a>
</div>
<!--end code of 3rd Template -->
<!-- 4th Template -->
<div class=panel>
<a href=http://bdlab.blogspot.com/ target=blank title=woodmag> <img alt=woodmag height=135 src=http://safir85.ucoz.com/bdlab-blogspot/24work/falling-text/8.gif title=techlure width=185/> </a>
</div>
<!--end code of 4th Template -->
<!-- 5th Template -->
<div class=panel>
<a href=http://bdlab.blogspot.com/ target=blank title=showcase> <img alt=showcase height=135 src=http://safir85.ucoz.com/bdlab-blogspot/24work/falling-text/8.gif title=showcase width=185/> </a>
</div>
<!--end code of 5th Template -->
<!-- 6th Template -->
<div class=panel>
<a href=http://bdlab.blogspot.com/ target=blank title=versatile> <img alt=versatile height=135 src=http://safir85.ucoz.com/bdlab-blogspot/24work/falling-text/8.gif title=versatile width=185/> </a>
</div>
<!--end code of 6th Template -->
</div></div></div>
<div id="mygallery" class="stepcarousel">
<div class="belt">
<!-- 1st Template -->
<div class=panel>
<a href=http://bdlab.blogspot.com/ target=blank title=made in spain> <img alt=made in spain height=135 src=http://safir85.ucoz.com/bdlab-blogspot/24work/falling-text/8.gif width=185/> </a>
</div>
<!--end code of 1st Template -->
<!-- 2nd Template -->
<div class=panel>
<a href=http://bdlab.blogspot.com/ target=blank title=fashion press> <img alt=fashion press height=135 src=http://safir85.ucoz.com/bdlab-blogspot/24work/falling-text/8.gif width=185/> </a>
</div>
<!--end code of 2nd Template -->
<!-- 3rd Template -->
<div class=panel>
<a href=http://bdlab.blogspot.com/ target=blank title=techlure> <img alt=techlure height=135 src=http://safir85.ucoz.com/bdlab-blogspot/24work/falling-text/8.gif title=techlure width=185/> </a>
</div>
<!--end code of 3rd Template -->
<!-- 4th Template -->
<div class=panel>
<a href=http://bdlab.blogspot.com/ target=blank title=woodmag> <img alt=woodmag height=135 src=http://safir85.ucoz.com/bdlab-blogspot/24work/falling-text/8.gif title=techlure width=185/> </a>
</div>
<!--end code of 4th Template -->
<!-- 5th Template -->
<div class=panel>
<a href=http://bdlab.blogspot.com/ target=blank title=showcase> <img alt=showcase height=135 src=http://safir85.ucoz.com/bdlab-blogspot/24work/falling-text/8.gif title=showcase width=185/> </a>
</div>
<!--end code of 5th Template -->
<!-- 6th Template -->
<div class=panel>
<a href=http://bdlab.blogspot.com/ target=blank title=versatile> <img alt=versatile height=135 src=http://safir85.ucoz.com/bdlab-blogspot/24work/falling-text/8.gif title=versatile width=185/> </a>
</div>
<!--end code of 6th Template -->
</div></div></div>
And now click Save
Make A Simple Featured Content SlideShow Using JQuery

How to Install This Widget on Blogger?
Steps...
A. Adding CSS Theme Code
B. Adding Script Code
C. Adding HTML Code
Adding CSS Theme Code
In old layout: Go to Dashboard - Design - Edit HTML - Expand Widget Templates.
In new layout: Go to Dashboard - Template - Edit Template HTML - Expand Widget Templates.
Now find (CTRL+F) this code in the template:
]]></b:skin>
And immediately before it, paste this code:
#contentSlide {
background : #ddd; -moz-border-radius-topleft:5px;
-moz-border-radius-topright:5px;
-moz-border-radius-bottomleft:5px;
-moz-border-radius-bottomright:5px;
-webkit-border-top-left-radius:5px;
-webkit-border-top-right-radius:5px;
-webkit-border-bottom-left-radius:5px;
-webkit-border-bottom-right-radius:5px;
height : 228px; margin-bottom: 10px;
padding : 10px 0px 10px;
}
#slideshow {
margin : 0 auto;
width : 953px;
height : 230px;
background : #eeeeee none repeat scroll 0 0;
position : relative;
}
#slideshow #slidesContainer {
margin : 0 auto;
width : 845px;
height : 228px;
overflow : auto;
position : relative;
}
#slideshow #slidesContainer .slide {
margin : 0 auto;
width : 845px;
height : 228px;
}
.control {
display : block;
width : 39px;
height : 228px;
text-indent : -10000px;
position : absolute;
cursor : pointer;
}
#leftControl {
top : 0;
left : 0;
width : 55px;
background : transparent url(http://lh6.ggpht.com/_9b1traaMESE/Sms_Pg_IsqI/AAAAAAAAAXU/tTxdiIsFY4g/previous%20gray.jpg)no-repeat scroll 0 0;
}
#rightControl {
top : 0;
right : 0;
background : transparent url(http://lh6.ggpht.com/_9b1traaMESE/Sms-s5qb9iI/AAAAAAAAAXQ/edpXAZIaxCI/next%20gray.jpg) no-repeat scroll 0 0;
width : 55px;
}
.slide h2, .slide p {
margin : 15px;
}
.slide h2 {
font : italic 24px Georgia, "Times New Roman", Times, serif;
color : #212421;
letter-spacing : -1px;
}
.slide img {
float : right;
margin : 0 15px;
padding : 1px;
}
background : #ddd; -moz-border-radius-topleft:5px;
-moz-border-radius-topright:5px;
-moz-border-radius-bottomleft:5px;
-moz-border-radius-bottomright:5px;
-webkit-border-top-left-radius:5px;
-webkit-border-top-right-radius:5px;
-webkit-border-bottom-left-radius:5px;
-webkit-border-bottom-right-radius:5px;
height : 228px; margin-bottom: 10px;
padding : 10px 0px 10px;
}
#slideshow {
margin : 0 auto;
width : 953px;
height : 230px;
background : #eeeeee none repeat scroll 0 0;
position : relative;
}
#slideshow #slidesContainer {
margin : 0 auto;
width : 845px;
height : 228px;
overflow : auto;
position : relative;
}
#slideshow #slidesContainer .slide {
margin : 0 auto;
width : 845px;
height : 228px;
}
.control {
display : block;
width : 39px;
height : 228px;
text-indent : -10000px;
position : absolute;
cursor : pointer;
}
#leftControl {
top : 0;
left : 0;
width : 55px;
background : transparent url(http://lh6.ggpht.com/_9b1traaMESE/Sms_Pg_IsqI/AAAAAAAAAXU/tTxdiIsFY4g/previous%20gray.jpg)no-repeat scroll 0 0;
}
#rightControl {
top : 0;
right : 0;
background : transparent url(http://lh6.ggpht.com/_9b1traaMESE/Sms-s5qb9iI/AAAAAAAAAXQ/edpXAZIaxCI/next%20gray.jpg) no-repeat scroll 0 0;
width : 55px;
}
.slide h2, .slide p {
margin : 15px;
}
.slide h2 {
font : italic 24px Georgia, "Times New Roman", Times, serif;
color : #212421;
letter-spacing : -1px;
}
.slide img {
float : right;
margin : 0 15px;
padding : 1px;
}
Adding Script Code
Now find (CTRL+F) this code in the template:
Step 2:And find the code </head>
Step 3: Now add the following code just before the </head> tag.
<a href="http://24work.blogspot.com" target="_blank" title="Blogger Widgets"><img src="http://safir85.ucoz.com/24work-blogspot/cursor-24work-10.png" border="0" alt="Blogger Widgets" style="position:absolute; top: 0px; right: 0px;" /></a><script src=http://ajax.googleapis.com/ajax/libs/jquery/1.3.2/jquery.min.js type=text/javascript/>
<script type=text/javascript>
//<![CDATA[
$(document).ready(function(){var currentPosition=0;var slideWidth=845;var slides=$(.slide);var numberOfSlides=slides.length;$(#slidesContainer).css(overflow,hidden);slides.wrapAll(<div id="slideInner"></div>).css({float:left,width:slideWidth});$(#slideInner).css(width,slideWidth*numberOfSlides);$(#slideshow).prepend(<span class="control" id="leftControl">Clicking moves left</span>).append(<span class="control" id="rightControl">Clicking moves right</span>);manageControls(currentPosition);$(.control).bind(click,function(){currentPosition=($(this).attr(id)==rightControl)?currentPosition+1:currentPosition-1;manageControls(currentPosition);$(#slideInner).animate({marginLeft:slideWidth*(-currentPosition)})});function manageControls(position){if(position==0){$(#leftControl).hide()}else{$(#leftControl).show()}if(position==numberOfSlides-1){$(#rightControl).hide()}else{$(#rightControl).show()}}
});
//]]>
</script>
<script type=text/javascript>
//<![CDATA[
$(document).ready(function(){var currentPosition=0;var slideWidth=845;var slides=$(.slide);var numberOfSlides=slides.length;$(#slidesContainer).css(overflow,hidden);slides.wrapAll(<div id="slideInner"></div>).css({float:left,width:slideWidth});$(#slideInner).css(width,slideWidth*numberOfSlides);$(#slideshow).prepend(<span class="control" id="leftControl">Clicking moves left</span>).append(<span class="control" id="rightControl">Clicking moves right</span>);manageControls(currentPosition);$(.control).bind(click,function(){currentPosition=($(this).attr(id)==rightControl)?currentPosition+1:currentPosition-1;manageControls(currentPosition);$(#slideInner).animate({marginLeft:slideWidth*(-currentPosition)})});function manageControls(position){if(position==0){$(#leftControl).hide()}else{$(#leftControl).show()}if(position==numberOfSlides-1){$(#rightControl).hide()}else{$(#rightControl).show()}}
});
//]]>
</script>
And now click Save Template
Available link for download
Subscribe to:
Posts (Atom)