Showing posts with label sm. Show all posts
Showing posts with label sm. Show all posts
Tuesday, November 1, 2016
Samsung SM A300H Stock Rom firmware
Samsung SM A300H Stock Rom firmware
Hello guys welcome to my blog (trickstrickzz.blogspot.com).
HERE
You can Download any Mobile Original(OG) Firmware/Stock Rom.
&
Its free So Download your mobile Firmware From Here...
HERE
You can Download any Mobile Original(OG) Firmware/Stock Rom.
&
Its free So Download your mobile Firmware From Here...
Samsung SM-A300H

Network - GSM / HSPA / LTE
SIM-Dual SIM (N-SIM,)
D Type-touchscreen,
Size- 4.5
Resolution -540 x 960 pix
Multi touch Screen-Yes
D Protection- Gorilla Glass 4
Platform-OS-Android OS, v4.4.4 (KitKat)
Chip set- Qualcomm Snapdragon 410 ( MSM8916)
CPU-Quad-core 1.2 GHz Cortex-A53
memory External-M SD,64 GB (uses SIM 2 slot)Internal-16 GB,1 GB RAM
Camera P -8 MP, LED flash
Secondary -5 MP
Battery - Non-removable Li-Ion 1900 mAh battery.
Samsung stock rom download files flash by odin only ..so first download odin flasher for samsung...then flash it via odin.
Download link attached below

DOWNLOAD
&
See How to Flash your Phone
1.Download and install Samsung USB Driver on your computer.
2. Download & extract zip file in your computer...
3. Power off your Samsung device.
4. Go to Download mode using vol-&home key&power key.on your Samsung Devices.
See full Details how about to flash click here
Available link for download

Monday, October 31, 2016
Samsung SM G530H Stock Rom firmware
Samsung SM G530H Stock Rom firmware
hello guys welcome to my blog (trickstrickzz.blogspot.com).
HERE
You can Download any Mobile Original(OG) Firmware/Stock Rom.
&
Its free
So Download your mobile Firmware From Here...
Samsung SM-G530H
Network -GPRS, EDGE, UMTS, HSDPA, HSUPA, HSPA+, LTE

SIM-Single SIM(M-SIM) or Dual SIM (M-SIM, dual stand-by)
Display - touchscreen, 16M
Size- 5.0(in)
D -Resolution -540 x 960 pixels
Multitouch Screen- Yes
OS- Google Android OS, v4.4.4 (KitKat), to v5.0.2 /v5.1.1
Chipset - Qualcom Snapdragon 410 (MSM8916)
CPU -Quad-core 1.2 GHz( Cortex-A53)
Memory Card slot- microSD, up to 64 GB
Internal- 8 GB, 1 GB RAM
Camera-P camera 8 MP,
Secondary - 5 MP
Sound - Alert types Vibration; MP3, ringtones
Loudspeaker -Yes
3.5mm jack-Yes
WLAN -Wi-Fi,Wi-Fi Direct, hotspot
Bluetooth -v4.0,
USB-microUSB v2.0
Battery - Removable Li-Ion 2600 mAh battery
Samsung stock rom download files flash by odin only ..so 1st download odin flasher for samsung...then flash it via odin.
Download link attached below

DOWNLOAD
&
See How to Flash your Phone
1.Download and install Samsung USB Driver on your computer.
2. Download & extract zip file in your computer...
3. Power off your Samsung device.
4. Go to Download mode using vol-&home key&power key at same time.on your Samsung Devices.
See full Details how about to flash click here
Available link for download
Sunday, October 23, 2016
Samsung Galaxy Note 3 Neo LTE SM N7505L How to Install N7505LUBUANB1 Android 4 3 Jelly Bean Firmware
Samsung Galaxy Note 3 Neo LTE SM N7505L How to Install N7505LUBUANB1 Android 4 3 Jelly Bean Firmware
Samsung Galaxy Note 3 Neo LTE SM-N7505L- How to Install N7505LUBUANB1 Android 4.3 Jelly Bean Firmware,N7505LUBUANB1 Android 4.3 Jelly Bean Firmware Last Updated on 25-Feb-2014. You can now update the UBUANB1 4.3 Jelly Bean official firmware on Samsung Galaxy Note 3 Neo SM-N7505L. Samsung recently started rolling out an OTA update about the firmware. The Galaxy Note 3 Neo N7505L recently released by Samsung with Android 4.3 Jelly Bean out of the box and this is the first official firmware update for the device. If you own the device and not yet updated this latest firmware, then update the same using our simple tutorial below. The below step by step guide will help you to download and flash the latest N7505LUBUANB1 Android 4.3 Jelly Bean Firmware manually through Odin.
 As the Galaxy Note 3 Neo N7505L already running on Android 4.3 Jelly Bean, you can expect few bug fixes and performance enhancement with this latest firmware update.
So, want to update your Galaxy Note 3 Neo N7505L to the latest UBUANB1 Android 4.3 Jelly Bean firmware? For official way, either you can go for OTA (over the air) from Settings-About Phone-Software Update or download firmware through the Samsung Kies utility. However, most of us prefer manual way to update official firmware. So, in this article you’ll find step by step manual guide to update the latest Android 4.3 UBUANB1 firmware on your Galaxy Note 3 Neo N7505L through Odin.
Peru: PET-N7505LUBUANB1-20140225213115.zip
Dominican Republic (Claro): CDR-N7505LUBUANB1-20140225213023.zip
[Firmware for rest of the countries and carrier will be added here when available]

So, want to update your Galaxy Note 3 Neo N7505L to the latest UBUANB1 Android 4.3 Jelly Bean firmware? For official way, either you can go for OTA (over the air) from Settings-About Phone-Software Update or download firmware through the Samsung Kies utility. However, most of us prefer manual way to update official firmware. So, in this article you’ll find step by step manual guide to update the latest Android 4.3 UBUANB1 firmware on your Galaxy Note 3 Neo N7505L through Odin.
Important Note:
“The firmware is released only for the Samsung Galaxy Note 3 Neo SM-N7505L model, so don’t try this in any other android device. Check your device model number from Settings-About Phone. Also the tutorial is based on Windows PC. Follow all the pre-requisites, procedures and steps carefully to avoid breaking your phone”.Android 4.3 Jelly Bean N7505LUBUANB1 Official Firmware Download List
Samsung rolled out the firmware for the following countries. The firmware which are unbranded or not locked to any carrier, no matter of which country or region, can be flashed on any Galaxy Note 3 Neo SM-N7505L model.Peru: PET-N7505LUBUANB1-20140225213115.zip
Dominican Republic (Claro): CDR-N7505LUBUANB1-20140225213023.zip
[Firmware for rest of the countries and carrier will be added here when available]
Pre-Requisites:
- Check battery percentage, your device should have at least 60% battery power
- Turn on USB Debugging mode, go to Settings-Developer Options-USB Debugging
- Backup important data and settings to external storage- follow this guide
- Install USB driver for your device on your computer- Download Samsung USB Driver
Points to be noted:
- If you are using any Custom ROM such as- CyanogenMod, Paranoid Android, AOKP, SLIM ROMs etc, then it’ll replaced by this official Stock ROM
- Custom Recovery (CWM or TWRP Recovery) will be replaced by Stock Recovery
- After flashing official firmware, your device will no longer belongs to rooted device. However you can root your device any time after flashing the firmware.
How to Install Android 4.3 Jelly Bean Official Firmware on Galaxy Note 3 Neo N7505L through Odin:
- Download Android 4.3 UBUANB1 Firmware for Galaxy Note 3 Neo N7505L from the above list
- Download Odin 3.09
- Switch off your phone and boot Galaxy Note 3 Neo N7505L into Download Mode by pressing and holding the Volume Down+Home+Power buttons (long press until the boot screen appear), now press Volume Up key to proceed to Download Mode.
- Extract the downloaded Odin3.09 zip file and run the Odin3 v3.09.exe file as an administrator (Right click on the .exe file and click on Run as administrator)
- Now connect your Galaxy Note 3 Neo N7505L to your computer via USB cable
- In Odin3 screen, you should see a COM Port number like “0:[COM7]” at ID:COM section and “Added!” text at the message box. This means your device has been detected by Odin3.
- Make sure that, only the “Auto Reboot” and “F. Reset Time” options are checked.
- Now, extract the downloaded firmware zip file, you’ll find a firmware file with extension .tar.md5
- In Odin screen, click on AP button and select the firmware file with .tar.md5 extension (The firmware file look something like: N7505LXXDLJ5_N7505LODDDLI7_INU.tar.md5)
- Now, click on the Start button to begin the installation process, wait few moments.
- Once completed, you would see “PASS!” message in ID:COM port having green background
- Your phone should automatically reboot after completion
- You can now disconnect your phone from computer
- Finish
Available link for download
Monday, October 17, 2016
Samsung Galaxy Note 3 SM N900 Simple Tutorial how to Root N900XXUDNB2 Android 4 4 2 Firmware
Samsung Galaxy Note 3 SM N900 Simple Tutorial how to Root N900XXUDNB2 Android 4 4 2 Firmware
Samsung Galaxy Note 3 SM-N900- Simple Tutorial how to Root N900XXUDNB2 Android 4.4.2 Firmware,A simple method to root N900XXUDNB2 Android 4.4.2 KitKat Firmware is now available at NasirTech. Samsung Galaxy Note 3 SM-N900 recently get updated to the N900XXUDNB2 4.4.2 KitKat Firmware. If you yet to update the firmware, then update the same by following the above link. Hope you updated this latest firmware on your device and now you can root the XXUDNB2 firmware using our simple tutorial below. The below guide will help you to root N900XXUDNB2 4.4.2 KitKat Firmware running on Galaxy Note 3 SM-N900. Continue reading the tutorial for complete guide.
After updating official firmware, your device no longer belongs to rooted device. So, after official firmware update, many of us prefer to root our device to enjoy some additional features that unrooted android device doesn’t offer. With a rooted android device, you can install apps that ask root permission, flash various custom ROMs, install MODs and tweak various features. Root removes default bloatware apps that free-up lots of memory space and extend the battery life. However, once rooted, manufacturer warranty will be void. But you can regain the warranty by following proper unroot process. To know more about benefits of rooting android device, read- Complete Note on What is Rooting and Benefits of Rooting Android Phone.
 So, want to root Galaxy Note 3 SM-N900 Running N900XXUDNB2 4.4.2 KitKat Firmware? Continue reading this page to get all the necessary steps to successfully root your device. The root file (CF-Auto-Root) we used in this tutorial is safe and have nearly 100% success rate. We’ll use Odin software to flash the root file.
The tutorial is made with simple step by step guide, so that even an android newbie user can follow and successfully root his/her device. However, in this process you may loss your personal data and settings. So, we recommend you to follow all the backup instructions before proceed to rooting guide.

After updating official firmware, your device no longer belongs to rooted device. So, after official firmware update, many of us prefer to root our device to enjoy some additional features that unrooted android device doesn’t offer. With a rooted android device, you can install apps that ask root permission, flash various custom ROMs, install MODs and tweak various features. Root removes default bloatware apps that free-up lots of memory space and extend the battery life. However, once rooted, manufacturer warranty will be void. But you can regain the warranty by following proper unroot process. To know more about benefits of rooting android device, read- Complete Note on What is Rooting and Benefits of Rooting Android Phone.
The tutorial is made with simple step by step guide, so that even an android newbie user can follow and successfully root his/her device. However, in this process you may loss your personal data and settings. So, we recommend you to follow all the backup instructions before proceed to rooting guide.
Warning!
- This rooting tutorial is only applicable for Samsung Galaxy Note 3 SM-N900 model (ha3g). So, don’t try this in any other android device. Check your device model number from- Settings-About Phone.
- Rooting voids your phone’s manufacturer warranty. However, you can get back the warranty anytime by following proper unroot process or by flashing official firmware.
- This guide is for educational purpose and you should try this at your own risk. We are not responsible if your device experience a soft brick after following this tutorial.
Pre-Requisites:
- Check battery percentage, charge your device to a decent level of at least 60% battery power. Your device should not turn off during installation.
- Turn on USB Debugging mode, go to Settings-Developer Options-USB Debugging
- Backup important data and settings to external storage- follow this guide
- Install USB driver for your device on your computer- Download Samsung USB Driver
All the above pre-requisites are very important and must be followed before proceed to installation guide. Hope you get all the above points and done as mentioned. Now, you are ready to move to the final step of this tutorial where we have arranged a step by step details guide to root Galaxy Note 3 SM-N900 running N900XXUDNB2 4.4.2 KitKat firmware.
Steps to Root Galaxy Note 3 SM-N900 Running N900XXUDNB2 4.4.2 KitKat through Odin:
- Download CF-Auto-Root for Galaxy Note 3 N900 and extract the Zip file: CF-Auto-Root-t03g-t03gxx-gtN900.zip
- Download Odin 3.09 and extract the Zip file: Odin3_V3.09.Zip
- Now, Switch off your phone and boot Galaxy Note 3 N900 into Download Mode by pressing and holding the Volume Down+Home+Power buttons together (long press until the boot screen appear), now press Volume Up key to proceed to Download Mode.
- Run the Odin3 v3.09.exe file as an administrator (Right click on the .exe file and click on Run as administrator)
- Now connect your Galaxy Note 3 N900 to your computer via USB cable
- In Odin3 screen, you should see a COM Port number like “0:[COM7]” at ID:COM section and “Added!” text at the message box. This means your device has been detected by Odin3.
- Make sure that, only the “Auto Reboot” and “F. Reset Time” options are checked.
- Now, click on the AP button and select the CF-Auto-Root-t03g-t03gxx-gtN900.tar.md5 file.
- Finally, click on the Start button to begin the rooting process, wait few moments.
- Once completed, you would see “PASS!” message in ID:COM port having green background
- Your phone should automatically reboot after completion
- You can now disconnect your phone from computer
- Finish
Available link for download
Friday, October 14, 2016
Samsung Galaxy Note 3 SM N900 How to Install N900XXUDNB2 Android 4 4 2 KitKat Firmware
Samsung Galaxy Note 3 SM N900 How to Install N900XXUDNB2 Android 4 4 2 KitKat Firmware
Samsung Galaxy Note 3 SM-N900- How to Install N900XXUDNB2 Android 4.4.2 KitKat Firmware,N900XXUDNB2 Android 4.4.2 KitKat Firmware Last Updated on 25-Feb-2014. You can now update the latest XXUDNB2 4.4.2 KitKat official firmware on Samsung Galaxy Note 3 SM-N900. Samsung recently started rolling out an OTA update about the firmware. The latest firmware build version is N900XXUDNB2. However, the firmware is currently released for Russia. Hope the firmware will hit other part of the world soon. The Galaxy Note 3 was released with Android 4.3 Jelly Bean and started received firmware update soon after the release. The device already get KitKat firmware update and here we have the latest official Android 4.4.2 KitKat firmware. If you own the device and yet to update this latest firmware, then update the same using our simple tutorial below. The below guide will help you to download and install the N900XXUDNB2 Android 4.4.2 KitKat Firmware manually through Odin.

So, want to update your Galaxy Note 3 N900 to the latest XXUDNB2 Android 4.4.2 KitKat firmware? There are two official way to update the firmware, either check and update via OTA (over the air) from your phone settings, go to Settings-General-About-Software Update or download and update through the Samsung Kies utility. However, if you are looking for a manual way to update the latest Android 4.4.2 XXUDNB2 firmware on your Galaxy Note 3 N900 via Odin, then follow this step by step tutorial.

Root N900XXUDNB2
Root N900XXUDNB2 Android 4.4.2 Firmware on Galaxy Note 3 SM-N900- Simple Tutorial
Android 4.4.2 KitKat is definitely a great update for the Samsung Galaxy Note 3 N900 users as they are eagerly waiting for great features that coming with this latest update.
Android 4.4.2 KitKat comes with many new features than the previous Android 4.3 Jelly Bean, some includes- Camera shortcut on lockscreen, White icons in status bar, Performance improvements, Transparent status bar, Improved keyboard layout in landscape orientation, Select between the stock messaging app or Hangouts for SMS and MMS, Select between TouchWiz or other launchers through settings, Wireless printing, Updated Google apps and many more.So, want to update your Galaxy Note 3 N900 to the latest XXUDNB2 Android 4.4.2 KitKat firmware? There are two official way to update the firmware, either check and update via OTA (over the air) from your phone settings, go to Settings-General-About-Software Update or download and update through the Samsung Kies utility. However, if you are looking for a manual way to update the latest Android 4.4.2 XXUDNB2 firmware on your Galaxy Note 3 N900 via Odin, then follow this step by step tutorial.
Important Note:
“The firmware is released only for the Samsung Galaxy Note 3 SM-N900 model, so don’t try this in any other android device. Check your device model number from Settings-General-About. Also the tutorial is based on Windows PC. Follow all the pre-requisites, procedures and steps carefully to avoid breaking your phone”.
Android 4.4.2 KitKat N900XXUDNB2 Official Firmware Download List
Samsung rolled out the firmware for the following countries. The firmware which are unbranded or not locked to any carrier, no matter of which country or region, can be flashed on any Galaxy Note 3 SM-N900 model.
Russia (MegaFon): N900XXUDNB2_N900MGFDNB3_MGF.zip
Russia: N900XXUDNB2_N900SERDNB2_SER.zip | Link2
Kazakhstan: N900XXUDNB2_N900OXEDNB2_SKZ.zip | Link2
Ukraine (Kyivstar): N900XXUDNB2_N900OXEDNB2_SEK.zip | Link2
Russia: N900XXUDNB2_N900SERDNB2_SER.zip | Link2
Kazakhstan: N900XXUDNB2_N900OXEDNB2_SKZ.zip | Link2
Ukraine (Kyivstar): N900XXUDNB2_N900OXEDNB2_SEK.zip | Link2
[Firmware for rest of the countries will be added here when available]
Previous Firmware Build
Samsung Galaxy Win GT-I8552- How to Install I8552XXANB1 Android 4.1.2 Jelly Bean FirmwareSamsung Galaxy S4 Active Mini GT-I8580- How to Install I8580XXUANB1 Android 4.2.2 Jelly Bean Firmware
Samsung Galaxy Tab 3 10.1 GT-P5210- How to Install P5210ZCUANA1 Android 4.2.2 Jelly Bean Firmware
Samsung Galaxy Grand 2 Duos SM-G7102- How to Install G7102XXUANB2 Android 4.3 Jelly Bean Firmware
Pre-Requisites:
- Check battery percentage, your device should have at least 60% battery power
- Turn on USB Debugging mode, go to Settings-General-Developer Options (As the Developer options are hidden by default on all Android device running on Android 4.2 or up, So go to Settings-General-About on your Galaxy Note 3 and tap Build Number for 7 times to visible the Developer options.) See the image above
- Backup important data and settings to external storage- follow this guide
- Install USB driver for your device on your computer- Download Samsung USB Driver
Points to be noted:
- If you are using any Custom ROM such as- CyanogenMod, Paranoid Android, AOKP, SLIM ROMs etc, then it’ll replaced by this official Stock ROM
- Custom Recovery (CWM or TWRP Recovery) will be replaced by Stock Recovery
- After flashing official firmware, your device will no longer belongs to rooted device. However you can root your device any time after flashing the firmware.
How to Update Android 4.4.2 KitKat Official Firmware on Galaxy Note 3 N900 via Odin:
- Download Android 4.4.2 XXUDNB2 Firmware for Galaxy Note 3 N900 from the above list
- Download Odin 3.09
- Switch off your phone and boot Galaxy Note 3 N900 into Download Mode by pressing and holding the Volume Down+Home+Power buttons (long press until the boot screen appear), now press Volume Up key to proceed to Download Mode.
- Extract the downloaded Odin3.09 zip file and run the Odin3 v3.09.exe file as an administrator (Right click on the .exe file and click on Run as administrator)
- Now connect your Galaxy Note 3 N900 to your computer via USB cable
- In Odin3 screen, you should see a COM Port number like “0:[COM7]” at ID:COM section and “Added!” text at the message box. This means your device has been detected by Odin3.
- Make sure that, only the “Auto Reboot” and “F. Reset Time” options are checked.
- Now, extract the downloaded firmware zip file, you’ll find a firmware file with extension .tar.md5
- In Odin screen, click on AP button and select the firmware file with .tar.md5 extension (The firmware file look something like: N900XXDLJ5_N900ODDDLI7_INU.tar.md5)
- Now, click on the Start button to begin the installation process, wait few moments.
- Once completed, you would see “PASS!” message in ID:COM port having green background
- Your phone should automatically reboot after completion
- You can now disconnect your phone from computer
- Finish
Available link for download
Wednesday, October 12, 2016
Samsung SM G530FZ Stock Rom firmware
Samsung SM G530FZ Stock Rom firmware
Hello guys welcome to my blog (trickstrickzz.blogspot.com).
HERE
You can Download any Mobile Original(OG) Firmware/Stock Rom.
&
Its free
So Download your mobile Firmware From Here...
Samsung SM-G530FZ

Network Technology GPRS, EDGE, UMTS, HSDPA, HSUPA, HSPA+, LTE
SIM Single SIM (Micro-SIM) or Dual SIM (Micro-SIM, dual stand-by)
Display-TFT touchscreen,
Size-5.0 inches
Resolution-540 x 960 pixels
Multi touch- Yes)S
OS- Google Android OS, v4.4.4 (KitKat),to v5.0.2/v5.1.1 (Lollipop)
Chip set - Qualcomm MSM8916 (Snapdragon 410)
CPU - Quad-core-1.2GHz
Memory-Card slot- m SD, to 64 GB.
Internal-8 GB, 1 GB RAM
Camera P 8 MP, LED flash,
S camera-5 MP, f/2.2, 1080p
Loudspeaker- Yes
3.5mm jack-Yes
WLAN -Wi-Fi . Wi-Fi Direct, hotspot
Bluetooth -v4.0,
USB-m USB v2.0
Battery- Removable Li-Ion 2600 mAh battery
Samsung SM-G530FZ Stock Rom....
Samsung Galaxy Grand Prime 4.4.4 firmware
Samsung stock rom download files flash by odin only ..so 1st download odin flasher for samsung...then flash it via odin.
Download link attached below

DOWNLOAD
&
See How to Flash your Phone
1.Download and install Samsung USB Driver on your computer.
2. Download & extract zip file in your computer...
3. Power off your Samsung device.
4. Go to Download mode using vol-&home key&power key.on your Samsung Devices.
See full Details how about to flash click here
Available link for download
Friday, October 7, 2016
Samsung SM A500G Stock Rom firmware
Samsung SM A500G Stock Rom firmware
Hello guys welcome to my blog (trickstrickzz.blogspot.com).
HERE
You can Download any Mobile Original(OG) Firmware/Stock Rom.
&
Its free
So Download your mobile Firmware From Here...
Samsung SM-A500G
Design-
Samsung galaxy a5 was Samsung first phone to feature a full metal body,the device a premium feel. Still its sharp edges & lines kept it from wining any awards.The Galaxy A5 will accomplish the latter remains doubtful,The similarities with the praised Galaxy S6-adding glass to the mix-make it much more pleasent phone to look..Hood-
The First Galaxy A5 not very slow in day 2 day use,its snapdragon 410 was even then a rather mediocre affair, A5 is powered by Samsung s own octacore Exynos 7580-used in galaxy s5 neo.The a5 remain the 2gb ram &16 gb of internal storege .the galaxy a5 most of the s66 design,ultra fast UFS storege on the board.features-
Display- Super amoled 5.2"D.resolution-1920*1080
Prosessor-64bit octa core
Ram -2gb
Rom-16 gb
micro sd -yes
battery-2900mah
Samsung stock rom download files flash by odin only ..so 1st download odin flasher for samsung...then flash it via odin.
Download link attached below

DOWNLOAD
&
See How to Flash your Phone
1.Download and install Samsung USB Driver on your computer.
2. Download & extract zip file in your computer...
3. Power off your Samsung device.
4. Go to Download mode using vol-&home key&power key.on your Samsung Devices.
See full Details how about to flash click here
Available link for download
Tuesday, October 4, 2016
Samsung SM E500 Stock Rom firmware
Samsung SM E500 Stock Rom firmware
Hello guys welcome to my blog (trickstrickzz.blogspot.com).
HERE
You can Download any Mobile Original(OG) Firmware/Stock Rom.
&
Its free
So Download your mobile Firmware From Here...
Samsung SM-E500
Samsung E500 is gsm &HSPA technology .samsung announced this device on 2015.available in market 2015.7 body weight -97.5grm only.CPU-1.2ghz (QuadCore)GPU-Exynos&.dual sim device.Card Slot-MicroSD-64gb(upto)&Internal-16gb.RAM-1.5gb.Primary Camera-8mp&secondary-5.0OS-Google Android(4.4.4 kitkat) Battery-2400mah(non removable).multi touch-yes,Display TFT display,5.0 inch display-touch wiz ui touch sensitive ui D Proctection-gorila glass4.Wifi- available.GPS-available....It is very good very value for money product..
Samsung stock rom download files flash by odin only ..so 1st download odin flasher for samsung...then flash it via odin.
Download link attached below

DOWNLOAD
1.Download and install Samsung USB Driver on your computer.
2. Download & extract zip file in your computer..
3. Power off your Samsung device.
4. Go to Download mode using vol-&home key&power key.on your Samsung Devices.
5.In the Download mode you will be see Download mode.
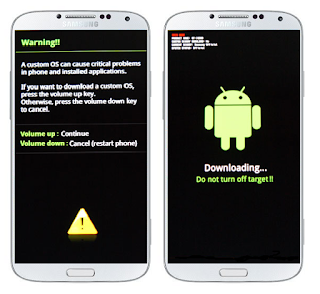
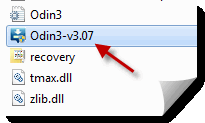
7:-Now open Odin 3 &connect your phone to the computer.
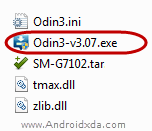
See full Details how about to flash click here
Any Problem Comment Me Guys......
Available link for download
Sunday, October 2, 2016
Samsung SM G7102 Stock Rom firmware
Samsung SM G7102 Stock Rom firmware
Hello guys welcome to my blog (trickstrickzz.blogspot.com).
HERE
You can Download any Mobile Original(OG) Firmware/Stock Rom.
&
Its free
So Download your mobile Firmware From Here...
Samsung SM-G7102
Samsung g7102 is gsm &HSPA technology .samsung announced this device on 2013.available in market 2014.7 body weight -97.5grm only.CPU-1.2ghz (QuadCore)GPU-adreno &.dual sim device.Card Slot-MicroSD-64gb(upto)&Internal-8gb.RAM-1.5gb.Primary Camera-8mp&secondary-5.OS-Google Android(4.3jellbean upgrade to4.4.2 kitkat) Battery-2600mah(removable).multi touch-yes,Display TFT display,5.25 inch display-touch wiz ui touch sensitive ui D Proctection-gorila glass4.Wifi- available.GPS-available....It is very good very value for money product..
Samsung stock rom download files flash by odin only ..so 1st download odin flasher for samsung...then flash it via odin.
Download link attached below

DOWNLOAD
&
See how to Flash your Device
1.Download and install Samsung USB Driver on your computer.
2. Download & extract zip file in your computer..
3. Power off your Samsung device.
4. Go to Download mode using vol-&home key&power key.on your Samsung Devices.
5.In the Download mode you will be see Download mode.
7:-Now open Odin 3 &connect your phone to the computer.
See full Details how about to flash click here
Available link for download
Samsung SM G360H Stock Rom firmware
Samsung SM G360H Stock Rom firmware
Hello guys welcome to my blog (trickstrickzz.blogspot.com).
HERE
You can Download any Mobile Original(OG) Firmware/Stock Rom.
&
Its free
So Download your mobile Firmware From Here...
Samsung SM-G360H features
Network Technology-GPRS, EDGE, UMTS, HSDPA, HSUPA, HSPA+, LTE
SIM
Single SIM (M-SIM) or Dual SIM (-SIM, dual standby)
Display -Capacitive touchscreen,16M.
Display -Capacitive touchscreen,16M.
Size -4.5 in
D Resolution- 480 x 800
Multi touch Screen- Yes
OS -OS- Google Android OS, v4.4.4 , ( to v5.1.1 )
Chipset- Qualcomm Snapdragon 410 (MSM8916 )
CPU Clock- Quad-core 1200mhz Cortex-A53
Memory Card - microSD, up to 64 GB.
D Resolution- 480 x 800
Multi touch Screen- Yes
OS -OS- Google Android OS, v4.4.4 , ( to v5.1.1 )
Chipset- Qualcomm Snapdragon 410 (MSM8916 )
CPU Clock- Quad-core 1200mhz Cortex-A53
Memory Card - microSD, up to 64 GB.
Internal -8 GB,
RAM-1GB
Camera (P)- 5 MP, f/2.6, autofocus, LED flash,
Video-720p
S camera-2 MP
Sound -Alert types-Vibration; MP3, ringtones
L speaker - Yes
3.5mm jack-Yes.
Sound -Alert types-Vibration; MP3, ringtones
L speaker - Yes
3.5mm jack-Yes.
WLAN Wi-Fi 802.11 Wi-Fi Direct,hotspot
Bluetooth - v4.0,
Bluetooth - v4.0,
GPS-Yes,
Radio- FM radio
USB- micro USB v2.0
Browser HTML
Digital TV (SM-G360BT)
Radio- FM radio
USB- micro USB v2.0
Browser HTML
Digital TV (SM-G360BT)
MP4/H.264 player MP3/WAV/eAAC+/FLAC player.
Photo/video editor
Samsung Galaxy Core Prime G360H 4.4.4 Firmware..
Samsung stock rom download files flash by odin only ..so 1st download odin flasher for samsung...then flash it via odin.
Download link attached below

DOWNLOAD
&
See How to Flash your Phone
1.Download and install Samsung USB Driver on your computer.
2. Download & extract zip file in your computer...
3. Power off your Samsung device.
4. Go to Download mode using vol-&home key&power key.on your Samsung Devices.
See full Details about how to flash your device click here
Available link for download
Thursday, September 29, 2016
How To Hard Reset Samsung Galaxy j7 SM J700F
How To Hard Reset Samsung Galaxy j7 SM J700F
warring :before you give handset to repair shop or buy new handset,please try the following procedure to Repair your device. Frist charge your battery more then 75%, backup your important data like phone-book,message,email,image,and setting and in most cases take out sim card and SD card. after doing hard reset not possible to recover your data, so online backup is always important. for all of your data,a backup should be Done. on a external device,hard drive raid system media or SD card.
Samsung Galaxy j7 (SM-J700F) How To Hard Reset

Hard Reset
1) Turn off the phone completely
2) press and hold both Volume UP + and Home ( middle ) + Power on
3) when Android Recovery menu screen appears release all keys.
4) select WIPE DATA/FACTORY RESET and confirm.
5) using the Volume down key and press Power
6) Yes -- Delete All data and press Power.
7) All data will be lost! Before doning a hard reset backup all important data.
After hard reset is done select Reboot system now. Press power to reboot the phone.
On dial screen enter this samsung Galaxy j7 (SM-J70F) Reset code : *2767*3855# All data will be lost!
samsung j7 J700F hard reset key,
samsung j7 hard reset solution,
samsung j7 J700F hard reset code,
samsung j7 factory reset,
samsung j7 pattern lock,
Available link for download
Monday, September 26, 2016
Samsung Galaxy Tab 3 Kids SM T2105 How to Install T2105UBANA1 Android 4 1 2 Jelly Bean Firmware
Samsung Galaxy Tab 3 Kids SM T2105 How to Install T2105UBANA1 Android 4 1 2 Jelly Bean Firmware
Samsung Galaxy Tab 3 Kids SM-T2105- How to Install T2105UBANA1 Android 4.1.2 Jelly Bean Firmware,T2105UBANA1 Android 4.1.2 Jelly Bean Firmware Last Updated on 26-Feb-2014. The Kids version of Samsung Galaxy Tab 3 Kids SM-T2105 recently received the UBANA1 4.1.2 Jelly Bean official firmware update. Samsung recently started rolled out an OTA update about the firmware. The latest firmware build version is T2105UBANA1. The device is running with Android 4.1.2 Jelly Bean from the release and not yet received any further android version. Samsung already released many regular firmware update for the device and here we have the latest available firmware for Galaxy Tab 3 Kids T2105. If you yet to update your device to this latest firmware then do it now by following the tutorial below. The below guide will help you to download and install the T2105UBANA1 Android 4.1.2 Jelly Bean Firmware manually through Odin. You can also check the latest available firmware for your device through OTA (over the air) from Settings-About Tablet-Software Update.
 The Galaxy Tab 3 Kids T2105 was released with Android 4.1.2 Jelly Bean and yet to receive Android 4.2.2 Jelly Bean or later android version. As the device already running on the Android 4.1.2 Jelly Bean, you can only expect few bug fixes and performance enhancement with this latest firmware update.All the above pre-requisites are very important and must follow before proceed to installation guide. Hope you get all the above points. Now, go through the below tutorial to install Android 4.1.2 T2105UBANA1 official firmware on Galaxy Tab 3 Kids T2105.
So, want to update your Galaxy Tab 3 Kids T2105 to the latest UBANA1 Android 4.1.2 Jelly Bean firmware? For official way, either you can go for OTA update or download firmware through the Samsung Kies utility. However, if you are looking for a manual way to update the latest Android 4.1.2 UBANA1 firmware on your Galaxy Tab 3 Kids T2105 through Odin then follow the step by step manual update guide below.
Important Note:
“The firmware is released only for the Samsung Galaxy Tab 3 Kids SM-T2105 model, so don’t try this in any other android device. Check your device model number from Settings-About Tablet. Also the tutorial is based on Windows PC. Follow all the pre-requisites, procedures and steps carefully to avoid breaking your Tablet”.
Android 4.1.2 Jelly Bean T2105UBANA1 Official Firmware Download List
Samsung rolled out the firmware for the following countries. The firmware which are unbranded or not locked to any carrier, no matter of which country or region, can be flashed on any Galaxy Tab 3 Kids SM-T2105 model.
Brazil: T2105UBANA1_T2105ZTOANA2_ZTO.zip | Link2
Trinidad and Tobago: TTT-T2105UBANA1-20140226134829.zip | Link2
Trinidad and Tobago: TTT-T2105UBANA1-20140226134829.zip | Link2
[Firmware for rest of the countries and carrier will be added here when available]
Pre-Requisites:
- Check battery percentage, your device should have at least 80% battery power
- Turn on USB Debugging mode,
- go to Settings-Developer Options-USB Debugging
- Backup important data and settings to external storage- follow this guide
- Install USB driver for your device on your computer- Download Samsung USB Driver
Points to be noted:
- If you are using any Custom ROM such as- CyanogenMod, Paranoid Android, AOKP, SLIM ROMs etc, then it’ll replaced by this official Stock ROM
- Custom Recovery (CWM or TWRP Recovery) will be replaced by Stock Recovery
- After flashing official firmware, your device will no longer belongs to rooted device. However you can root your device any time after flashing the firmware.
How to Install Android 4.1.2 Jelly Bean Official Firmware on Galaxy Tab 3 Kids T2105 through Odin:
- Download Android 4.1.2 UBANA1 Firmware for Galaxy Tab 3 Kids T2105 from the above list
- Download Odin 3.09
- Switch off your Tablet and boot Galaxy Tab 3 Kids T2105 into Download Mode by pressing and holding the Volume Down and Power keys together until you get the warning message, now press Volume Up key to proceed to Download Mode..
- Extract the downloaded Odin3.09 zip file and run the Odin3 v3.09.exe file as an administrator (Right click on the .exe file and click on Run as administrator)
- Now connect your Galaxy Tab 3 Kids T2105 to your computer via USB cable
- In Odin3 screen, you should see a COM Port number like “0:[COM7]” at ID:COM section and “Added!” text at the message box. This means your device has been detected by Odin3.
- Make sure that, only the “Auto Reboot” and “F. Reset Time” options are checked.
- Now, extract the downloaded firmware zip file, you’ll find a firmware file with extension .tar.md5
- In Odin screen, click on AP button and select the firmware file with .tar.md5 extension (The firmware file look something like: T2105XXDLJ5_T2105ODDDLI7_INU.tar.md5)
- Now, click on the Start button to begin the installation process, wait few moments.
- Once completed, you would see “PASS!” message in ID:COM port having green background
- Your Tablet should automatically reboot after completion
- You can now disconnect your Tablet from computer
- Finish
Congrats! you have completed the tutorial and your Galaxy Tab 3 Kids T2105 is now ready with the latest available firmware. Hope you successfully update UBANA1 Android 4.1.2 Jelly Bean official firmware on Galaxy Tab 3 Kids SM-T2105. If you followed everything as mentioned in the above tutorial, then your device should now running on the latest Android 4.1.2 Jelly Bean build version UBANA1. You can verify the firmware update details from Settings-About Tablet. For any queries feel free to contact with us any time and don’t forget to share your experience in the comment below.
Available link for download
Sunday, September 25, 2016
Samsung Galaxy Core LTE SM G386F How to Install G386FXXUANB4 Android 4 2 2 Jelly Bean Firmware
Samsung Galaxy Core LTE SM G386F How to Install G386FXXUANB4 Android 4 2 2 Jelly Bean Firmware
Samsung Galaxy Core LTE SM-G386F- How to Install G386FXXUANB4 Android 4.2.2 Jelly Bean Firmware,G386FXXUANB4 Android 4.2.2 Jelly Bean Firmware Last Updated on 24-Feb-2014. Samsung Galaxy Core LTE SM-G386F recently received the XXUANB4 Android 4.2.2 Jelly Bean official firmware update. Samsung started rolling out an OTA update about the firmware. The latest firmware build version is G386FXXUANB4. However, the firmware is currently released for Austria (A1). Hope the firmware will heat other part of the world soon.. The device already get firmware update and here we have the latest official firmware. If you wish to update your device with this latest firmware, then you can now update the same using our simple tutorial below. The below guide will help you to download and install the G386FXXUANB4 Android 4.2.2 Jelly Bean Firmware manually through Odin. You can also check latest available firmware for your device through OTA (over the air) from Settings-About Phone-Software Update.
 If your Galaxy Core LTE G386F already running on Android 4.2.2 Jelly Bean, then you can only expect few bug fixes and performance enhancement with this latest firmware update.
All the above pre-requisites are very important and must follow before proceed to installation guide. Hope you get all the above points. Now, go through the below tutorial to install Android 4.2.2 G386FXXUANB4 official firmware on Galaxy Core LTE G386F.
So, want to update your Galaxy Core LTE G386F to the latest XXUANB4 Android 4.2.2 Jelly Bean firmware? To install in official way, either you can go for OTA update as mentioned above or download firmware through the Samsung Kies utility. However, most of us prefer manual way to update official firmware. So, in this article you’ll find step by step manual guide to update the latest Android 4.2.2 XXUANB4 firmware on your Galaxy Core LTE G386F through Odin.
Important Note:
“The firmware is released only for the Samsung Galaxy Core LTE SM-G386F model, so don’t try this in any other android device. Check your device model number from Settings-About Phone. Also the tutorial is based on Windows PC. Follow all the pre-requisites, procedures and steps carefully to avoid breaking your phone”.
Android 4.2.2 Jelly Bean G386FXXUANB4 Official Firmware Download List
Samsung rolled out the firmware for the following countries. The firmware which are unbranded or not locked to any carrier, no matter of which country or region, can be flashed on any Galaxy Core LTE SM-G386F model.
Austria (A1): ATO-G386FXXUANB4-20140224145431.zip
[Firmware for rest of the countries and carrier will be added here when available]
Samsung Galaxy Win GT-I8552- How to Install I8552XXANB1 Android 4.1.2 Jelly Bean Firmware
Samsung Galaxy S3 GT-I9300T Simple Tutorial Root I9300TDUUGNA4 Android 4.3 jelly bean Firmware
Previous Firmware Build:
Samsung Galaxy S3 GT-I9300T- How to Install I9300TDUUGNA4 Android 4.3 Jelly Bean Firmware.Samsung Galaxy Win GT-I8552- How to Install I8552XXANB1 Android 4.1.2 Jelly Bean Firmware
Samsung Galaxy S3 GT-I9300T Simple Tutorial Root I9300TDUUGNA4 Android 4.3 jelly bean Firmware
Pre-Requisites:
- Check battery percentage, your device should have at least 60% battery power
- Turn on USB Debugging mode, go to Settings-Developer Options-USB Debugging
- Backup important data and settings to external storage- follow this guide
- Install USB driver for your device on your computer- Download Samsung USB Driver
Points to be noted:
- If you are using any Custom ROM such as- CyanogenMod, Paranoid Android, AOKP, SLIM ROMs etc, then it’ll replaced by this official Stock ROM
- Custom Recovery (CWM or TWRP Recovery) will be replaced by Stock Recovery
- After flashing official firmware, your device will no longer belongs to rooted device. However you can root your device any time after flashing the firmware.
How to Install Android 4.2.2 Jelly Bean Official Firmware on Galaxy Core LTE G386F through Odin:
- Download Android 4.2.2 XXUANB4 Firmware for Galaxy Core LTE G386F from the above list
- Download Odin 3.09
- Switch off your phone and boot Galaxy Core LTE G386F into Download Mode by pressing and holding the Volume Down+Home+Power buttons (long press until the boot screen appear), now press Volume Up key to proceed to Download Mode.
- Extract the downloaded Odin3.09 zip file and run the Odin3 v3.09.exe file as an administrator (Right click on the .exe file and click on Run as administrator)
- Now connect your Galaxy Core LTE G386F to your computer via USB cable
- In Odin3 screen, you should see a COM Port number like “0:[COM7]” at ID:COM section and “Added!” text at the message box. This means your device has been detected by Odin3.
- Make sure that, only the “Auto Reboot” and “F. Reset Time” options are checked.
- Now, extract the downloaded firmware zip file, you’ll find a firmware file with extension .tar.md5
- In Odin screen, click on AP button and select the firmware file with .tar.md5 extension (The firmware file look something like: G386FXXDLJ5_G386FODDDLI7_INU.tar.md5)
- Now, click on the Start button to begin the installation process, wait few moments.
- Once completed, you would see “PASS!” message in ID:COM port having green background
- Your phone should automatically reboot after completion
- You can now disconnect your phone from computer
- Finish
Congrats! you have finish the tutorial to update Android 4.2.2 Jelly Bean official firmware on Galaxy Core LTE SM-G386F. Hope you successfully done the update process. If you followed everything as mentioned above, then your your Galaxy Core LTE should now running on the latest Android 4.2.2 Jelly Bean build version XXUANB4. You can confirm the firmware update details from Settings-About Phone. If you stuck in any point or find any issue with the download link, the feel free to contact with us using the comment form below.
Available link for download
Saturday, September 24, 2016
Samsung Galaxy Note 3 Neo SM N7500Q How to Install N7500QXXUANB1 Android 4 3 Jelly Bean Firmware
Samsung Galaxy Note 3 Neo SM N7500Q How to Install N7500QXXUANB1 Android 4 3 Jelly Bean Firmware
Samsung Galaxy Note 3 Neo SM-N7500Q- How to Install N7500QXXUANB1 Android 4.3 Jelly Bean Firmware,N7500QXXUANB1 Android 4.3 Jelly Bean Firmware Last Updated on 25-Feb-2014. You can now update the XXUANB1 4.3 Jelly Bean official firmware on Samsung Galaxy Note 3 Neo SM-N7500Q. Samsung recently started rolling out an OTA update about the firmware. The latest firmware build version is N7500QXXUANB1. However, the firmware is currently out for Turkey. Hope the firmware will hit other part of the world soon. The Galaxy Note 3 Neo N7500Q recently released by Samsung with Android 4.3 Jelly Bean out of the box and this is the first official firmware update for the device. If you own the device and not yet updated this latest firmware, then update the same using our simple tutorial below. The below step by step guide will help you to download and flash the latest N7500QXXUANB1 Android 4.3 Jelly Bean Firmware manually through Odin.
As the Galaxy Note 3 Neo N7500Q already running on Android 4.3 Jelly Bean, you can expect few bug fixes and performance enhancement with this latest firmware update.
So, want to update your Galaxy Note 3 Neo N7500Q to the latest XXUANB1 Android 4.3 Jelly Bean firmware? For official way, either you can go for OTA (over the air) from Settings-About Phone-Software Update or download firmware through the Samsung Kies utility. However, most of us prefer manual way to update official firmware. So, in this article you’ll find step by step manual guide to update the latest Android 4.3 XXUANB1 firmware on your Galaxy Note 3 Neo N7500Q through Odin.
Turkey: TUR-N7500QXXUANB1-20140218115850.zip
[Firmware for rest of the countries and carrier will be added here when available]
So, want to update your Galaxy Note 3 Neo N7500Q to the latest XXUANB1 Android 4.3 Jelly Bean firmware? For official way, either you can go for OTA (over the air) from Settings-About Phone-Software Update or download firmware through the Samsung Kies utility. However, most of us prefer manual way to update official firmware. So, in this article you’ll find step by step manual guide to update the latest Android 4.3 XXUANB1 firmware on your Galaxy Note 3 Neo N7500Q through Odin.
Important Note:
“The firmware is released only for the Samsung Galaxy Note 3 Neo SM-N7500Q model, so don’t try this in any other android device. Check your device model number from Settings-About Phone. Also the tutorial is based on Windows PC. Follow all the pre-requisites, procedures and steps carefully to avoid breaking your phone”.Android 4.3 Jelly Bean N7500QXXUANB1 Official Firmware Download List
Samsung rolled out the firmware for the following countries. The firmware which are unbranded or not locked to any carrier, no matter of which country or region, can be flashed on any Galaxy Note 3 Neo SM-N7500Q model.Turkey: TUR-N7500QXXUANB1-20140218115850.zip
[Firmware for rest of the countries and carrier will be added here when available]
Pre-Requisites:
- Check battery percentage, your device should have at least 60% battery power
- Turn on USB Debugging mode, go to Settings-Developer Options-USB Debugging
- Backup important data and settings to external storage- follow this guide
- Install USB driver for your device on your computer- Download Samsung USB Driver
Points to be noted:
- If you are using any Custom ROM such as- CyanogenMod, Paranoid Android, AOKP, SLIM ROMs etc, then it’ll replaced by this official Stock ROM
- Custom Recovery (CWM or TWRP Recovery) will be replaced by Stock Recovery
- After flashing official firmware, your device will no longer belongs to rooted device. However you can root your device any time after flashing the firmware.
How to Install Android 4.3 Jelly Bean Official Firmware on Galaxy Note 3 Neo N7500Q through Odin:
- Download Android 4.3 XXUANB1 Firmware for Galaxy Note 3 Neo N7500Q from the above list
- Download Odin 3.09
- Switch off your phone and boot Galaxy Note 3 Neo N7500Q into Download Mode by pressing and holding the Volume Down+Home+Power buttons (long press until the boot screen appear), now press Volume Up key to proceed to Download Mode.
- Extract the downloaded Odin3.09 zip file and run the Odin3 v3.09.exe file as an administrator (Right click on the .exe file and click on Run as administrator)
- Now connect your Galaxy Note 3 Neo N7500Q to your computer via USB cable
- In Odin3 screen, you should see a COM Port number like “0:[COM7]” at ID:COM section and “Added!” text at the message box. This means your device has been detected by Odin3.
- Make sure that, only the “Auto Reboot” and “F. Reset Time” options are checked.
- Now, extract the downloaded firmware zip file, you’ll find a firmware file with extension .tar.md5
- In Odin screen, click on AP button and select the firmware file with .tar.md5 extension (The firmware file look something like: N7500QXXDLJ5_N7500QODDDLI7_INU.tar.md5)
- Now, click on the Start button to begin the installation process, wait few moments.
- Once completed, you would see “PASS!” message in ID:COM port having green background
- Your phone should automatically reboot after completion
- You can now disconnect your phone from computer
- Finish
Available link for download
Wednesday, September 21, 2016
Samsung Galaxy Grand 2 Duos SM G7102 How to Install G7102XXUANB2 Android 4 3 Jelly Bean Firmware
Samsung Galaxy Grand 2 Duos SM G7102 How to Install G7102XXUANB2 Android 4 3 Jelly Bean Firmware
Samsung Galaxy Grand 2 Duos SM-G7102- How to Install G7102XXUANB2 Android 4.3 Jelly Bean Firmware,G7102XXUANB2 Android 4.3 Jelly Bean Firmware Last Updated on 24-Feb-2014. Samsung Galaxy Grand 2 Duos SM-G7102 recently received the latest XXUANB2 4.3 Jelly Bean official firmware update. Samsung started rolling out an OTA update about the firmware. The latest firmware build version is G7102XXUANB2. The Galaxy Grand 2 Duos recently released by Samsung with Android 4.3 Jelly Bean out of the box and already get many firmware update. Here we have the latest available official firmware for the device. If you own the device and not yet updated this latest firmware, then update the same using our simple tutorial below. The below guide will help you to download and install the G7102XXUANB2 Android 4.3 Jelly Bean firmware manually through Odin.
 All the above pre-requisites are very important and must follow before proceed to installation guide. Hope you get all the above points. Now, go through the below tutorial to install Android 4.3 G7102XXUANB2 official firmware on Galaxy Grand 2 Duos G7102.
As the Galaxy Grand 2 Duos G7102 already running on the Android 4.3 Jelly Bean, you can only expect few bug fixes and performance enhancement with this latest Android 4.3 Jelly Bean firmware update. So, want to update your Galaxy Grand 2 Duos G7102 to the latest XXUANB2 Android 4.3 Jelly Bean firmware? To install in official way, either you can go for OTA update from Settings-About-Software Update or download firmware through the Samsung Kies utility. However, most of us prefer manual way to update official firmware. So, in this article you’ll find step by step manual guide to update the latest Android 4.3 XXUANB2 firmware on your Galaxy Grand 2 Duos G7102 through Odin.
Important Note:
“The firmware is released only for the Samsung Galaxy Grand 2 Duos SM-G7102 model, so don’t try this in any other android device. Check your device model number from Settings-About Phone. Also the tutorial is based on Windows PC. Follow all the pre-requisites, procedures and steps carefully to avoid breaking your phone”.
Android 4.3 Jelly Bean G7102XXUANB2 Official Firmware Download List
Samsung rolled out the firmware for the following countries. The firmware which are unbranded or not locked to any carrier, no matter of which country or region, can be flashed on any Galaxy Grand 2 Duos SM-G7102 model. Vietnam: XXV-G7102XXUANB2-20140224120649.zip
Samsung Galaxy S4 GT-I9500 How TO Root I9500XXUEMK8 Android 4.3 Jelly Bean Firmware
How To Root R950VXUBMK3 Android 4.3 Jelly Bean Firmware Running on US Cell Samsung Galaxy Note 2
How To Root L710VPUCMK3 Android 4.3 Jelly Bean Firmware Running on Samsung Galaxy S3
Samsung Galaxy I9205 Mega 6.3 JB Firmware How to Install I9205XXUCML8 4.2.2 Update Guide
Previous Firmware Build
Samsung Galaxy Note 3 SM-N900- How to Install N900XXUDNA6 Android 4.4.2 KitKat Firmware.Samsung Galaxy S4 GT-I9500 How TO Root I9500XXUEMK8 Android 4.3 Jelly Bean Firmware
How To Root R950VXUBMK3 Android 4.3 Jelly Bean Firmware Running on US Cell Samsung Galaxy Note 2
How To Root L710VPUCMK3 Android 4.3 Jelly Bean Firmware Running on Samsung Galaxy S3
Samsung Galaxy I9205 Mega 6.3 JB Firmware How to Install I9205XXUCML8 4.2.2 Update Guide
Pre-Requisites:
- Check battery percentage, your device should have at least 60% battery power
- Turn on USB Debugging mode, go to Settings-Developer Options-USB Debugging
- Backup important data and settings to external storage- follow this guide
- Install USB driver for your device on your computer- Download Samsung USB Driver
Points to be noted:
- If you are using any Custom ROM such as- CyanogenMod, Paranoid Android, AOKP, SLIM ROMs etc, then it’ll replaced by this official Stock ROM
- Custom Recovery (CWM or TWRP Recovery) will be replaced by Stock Recovery
- After flashing official firmware, your device will no longer belongs to rooted device. However you can root your device any time after flashing the firmware.
How to Install Android 4.3 Jelly Bean Official Firmware on Galaxy Grand 2 Duos G7102 through Odin:
- Download Android 4.3 XXUANB2 Firmware for Galaxy Grand 2 Duos G7102 from the above list
- Download Odin 3.09
- Switch off your phone and boot Galaxy Grand 2 Duos G7102 into Download Mode by pressing and holding the Volume Down+Home+Power buttons (long press until the boot screen appear), now press Volume Up key to proceed to Download Mode.
- Extract the downloaded Odin3.09 zip file and run the Odin3 v3.09.exe file as an administrator (Right click on the .exe file and click on Run as administrator)
- Now connect your Galaxy Grand 2 Duos G7102 to your computer via USB cable
- In Odin3 screen, you should see a COM Port number like “0:[COM7]” at ID:COM section and “Added!” text at the message box. This means your device has been detected by Odin3.
- Make sure that, only the “Auto Reboot” and “F. Reset Time” options are checked.
- Now, extract the downloaded firmware zip file, you’ll find a firmware file with extension .tar.md5
- In Odin screen, click on AP button and select the firmware file with .tar.md5 extension (The firmware file look something like: G7102XXDLJ5_G7102ODDDLI7_INU.tar.md5)
- Now, click on the Start button to begin the installation process, wait few moments.
- Once completed, you would see “PASS!” message in ID:COM port having green background
- Your phone should automatically reboot after completion
- You can now disconnect your phone from computer
- Finish
Congrats! you have completed the tutorial to update Android 4.3 Jelly Bean official firmware on Galaxy Grand 2 Duos SM-G7102. Hope you successfully done the update process. If you followed everything as mentioned in the above tutorial, then your Galaxy Grand 2 Duos should now running on the latest Android 4.3 Jelly Bean build version XXUANB2. You can confirm the firmware update details from Settings-About Phone. If you stuck in any point or find any issue with the download link, then feel free to contact with us using the comment form below.
Available link for download
Subscribe to:
Posts (Atom)